


HOW TO PRESS SEAWEED FOR ART
|
Time to read 5 min
|
Time to read 5 min
There are over 600 species of seaweed in the waters around the British Isles and these are grouped into 3 different taxonomy categories; brown, red and green. No two specimens are the same and they are all uniquely beautiful.
If you are looking for a delicate, petal or flower-like seaweed to press, then look for species like Fern Weed, which is in the picture below. These types of seaweed are slightly harder to position and it takes patience... but they are worth it once pressed. Fern weeds are our best selling pressed seaweed prints.
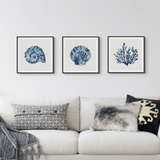
If you like a more strong and graphic/sculptural look then heavier seaweeds like dulse and wracks can be great in a modern interior. Here is an example of one of our pressed Dulse.
Seaweed collecting and pressing is a wonderful way to enjoy a walk in nature, especially with children during the holidays, but you can collect seaweed at any time of year.
All you need is access to a beach and a few basic supplies listed below.
The above is quick video of positioning seaweed ready to be dried & pressed.
We collected seaweed from the south coast of the Isle of Wight and the west coast of Cornwall and Scotland to make pressings for seaweed prints, and painting watercolour seaweed paintings.
Through the summer we mostly found red seaweed, in autumn and winter, we see more green and brown.
Low tide is the perfect time for collecting seaweed specimens as there will be a selection washed up on the beach, you can check the tide times for your local beaches, only collect the seaweed which is unattached rather than taking live seaweed which is attached to rocks.
Fill your buckets or zip bags with the best seaweed you can find and include some seawater to prevent them from drying out whilst you get them home.
You will want to keep your seaweed fresh and start the process as soon as you can to ensure the seaweed keeps it's beautiful natural colours.
1. Gather all the tools listed and wash your seaweed in tap water to clean it from debris or sand.
2. Fill your baking tray or bucket with an inch of tepid tap water and submerge a sheet of watercolour paper into it.
3. Take your seaweed and give it a rinse to remove all sand and other debris.
4. Gently float it into the water prising it apart with your paintbrush or chopstick to reveal its full form. Patience is required as it can take some time to get this right, and if you are a perfectionist, you may wish to trim your seaweed to give it a more pleasing shape.
Once you are happy with how your seaweed looks you will need to slowly and carefully lift the paper out of the tray, whilst trying not to disturb the seaweed.
In our experience, this is best done very carefully by first lifting from one end, and letting the water slowly run off the other end, this will trap the seaweed onto the paper, and you can correct small movements afterwards with your tools.
1. Lay your watercolour paper onto cardboard or newspaper and gently dab with paper towels to remove most of the surface water.
2. Next, place a piece of mesh fabric, or muslin over the top of the seaweed to fix it into place and then layer this with old towels - these will soak up water and begin drying the seaweed.
3. On top of these, place weights - large heavy books are perfect for this job.
If you have access to a large flower press, you can use it. Or you could make one with two sections of non-porous wood, like a coated MDF, sandwich them together, drill holes in all 4 corners through both pieces of wood, and then tread through large screws and wingnuts to tighten them together.

The seaweed drying process can take a couple of days or up to 2 weeks, depending on the thickness of the seaweed. Every couple of days you should replace the towels as they soak up the moisture, keep checking on your seaweed pressing and once the watercolour paper is completely dry you can get ready to frame and hang your newly pressed seaweed art.
(For tips on how to hang art, read our blog post)
We love painting watercolour art, and painting seaweed watercolour is very relaxing.
Here's one on our studio artists painting the bestselling - 'Unknown Species' from our Indigo Watercolour Seaweed collection.
This is a great creative art project to try at home.


